Spring Cupcakes
Spring is my favourite time of the year. The weather is perking up, the days are longer and it’s my birthday month - what more could a girl want? I’ve been baking lots of pretty cupcakes to celebrate the Easter holiday and thought I’d share a few tips on how to impress your family and friends with gorgeous handmade toppers for your cupcakes.
Judith Bond is a professional cake lover, enthusiastic photographer, passionate blogger, happy wife, dachshund Mum, and lifelong North Walian. You can follow her on Instagram here.
You will need;
- Non-stick board or work surface
- 250g white modelling paste
- Food colouring - choose 2 colours that blend well together
- Set of 4 Blossom Flower Plunger Cutters
- Set of 3 Flower Plunger Cutters
- 2.5 inch fluted circle cutter
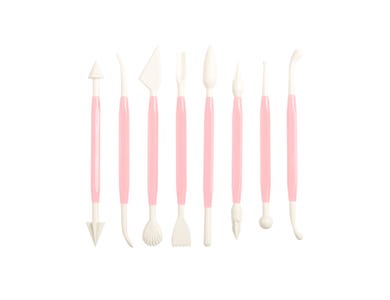
- Set of 8 Sculpting Tools
- Sharp knife
- Non-stick Rolling Pin with Sizing Rings
- Foam Decoration Mat
- Edible glue and small brush
- Coloured sugar pearls
- TOP TIP - treat yourself to a box of vegetable shortening from the supermarket - rub a little into your hands and onto the board. This will ensure your modelling paste doesn’t stick to the board or your hands and will make it much easier to work with.
Step 1
Decide on your colour scheme. Here, I’ve used a vibrant red and baby pink but you could choose red/black or red/purple
Step 2
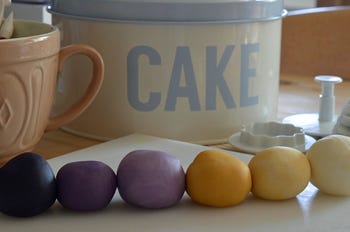
Divide your modelling paste into 6 pieces and soften before tinting each piece a different shade from light to dark. Add a small dot of colouring with a cocktail stick for pale shades and more for a darker colour. Knead the paste well to mix the colour in (Picture 1).
Step 3
Modelling paste dries out very quickly so keep your colours in an airtight bag while you’re not working on them.
Step 4
Start by making the base for your toppers. Roll the modelling paste using your small rolling pin with spacers to get an even thickness of no more than about 2mm - then cut fluted circles. You can do a few in each colour.
Step 5
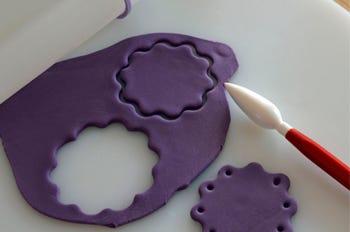
Using your modelling tools, make a small hole on each of the flutes round the edge to give a pretty cut-out effect. Carefully lift them onto a tray or cutting board to dry (Picture 2).
Step 6
Now you can get to work on your flowers. Roll the paste, but this time thinner - you can do this by removing the spacers from your pin. As you are rolling, lift the paste off the board a few times to make sure it doesn’t stick.
Step 7
Choose your flower cutters and cut out as many different sized flowers as you like in different shades. Make sure that all your flowers are smaller than the size of the bases. When you press down your cutter, give it a good wiggle for clean edges - this will make your flowers looks more professional. Lift the flowers with a small knife and push the centre into the dip of your foam drying tray, or egg box to give a curved effect (Picture 3).
Step 8
While the flowers are still soft, dab the centre with edible glue, stick a pearl onto your flower and let them dry for a few hours, preferably overnight.

Step 9
To assemble your toppers, apply a small dab of glue to the underside of the flower, gently stick to the base and hold while it adheres (Picture 4).
Step 10
Have fun with the designs and make them all slightly different. For some, use a single large flower, others you can use a few tiny flowers.

Step 11
When you have baked your cupcakes and swirled them with buttercream, carefully place the topper onto the cupcake.
Step 12
Display your finished cakes on a nice stand or pretty tray and they will make the perfect Easter centrepiece.