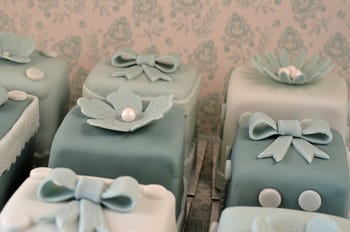
Summer Mini Cakes
Made by the amazing Judith Bond Cakes, these Summer Mini Cakes are perfect for a family celebration, a summer garden party or a gift for someone special.
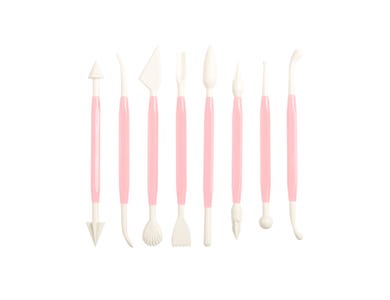
If you have plenty of time and imagination, a bit of baking know-how, and a set of Mason Cash Set of 8 Sculpting Tools, you’re all set to start.
I love a good wedding here at Judith Bond Cakes and the season is well underway. Every wedding is unique and I work hard to reflect the personality of the couple and bring something special to their day.
This week I’ve been making mini cakes for a couple getting married in Gretna Green. It’s been such fun making them, so I thought I’d let you see behind the scenes and show you how to make these pretty little cakes at home.
You will need;
- Madeira Cake
- A jar of seedless raspberry jam
- Buttercream (500g unsalted butter & 1kg icing sugar, sieved)
- Non-stick board or work surface
- Small palette knife
- 1 kg White Sugar paste
- 250g White Modelling paste
- 100g White Flower paste
- 12 x 4” square thin silver boards
- Colour paste - we used duck egg blue
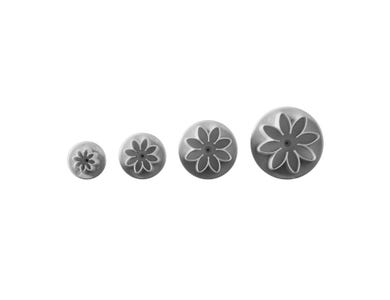
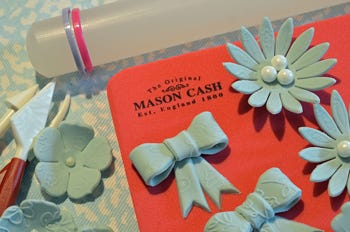
- Flower cutters
- Fondant Wheel Set
- Embossing mat
- Modelling tools
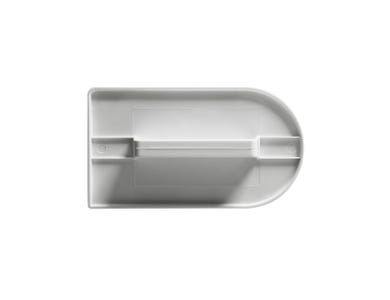
- 2 Icing Smoothers - 2 is better than 1!
- Sharp knife
- Small rolling pin with spacers
- Foam drying mat
- Edible glue and small brushes
- Edible sugar pearls
- 3 tier floral cupcake stand or floral gift box
- Time Required - A good few hours over 2 days. Be patient!
- Skill Level - Intermediate
- Don’t forget your vegetable shortening - rub a little into your hands and onto the board to make the sugar paste easier to work with
Step 1 - Making the buttercream
- Whip 500g of unsalted butter until soft. Add half the icing sugar until blended, then repeat with the other half. You may need to add a dash of warm water or milk to get a soft consistency.
Step 2 - Preparing the sponges
- Slice the top off your madeira cake to create a flat surface, and turn it upside down. Cut the cake in to 12 equal cubes, and place your sponge cubes on a silver board. Carefully slice each cube horizontally across the middle and fill with a small amount of buttercream and jam. Cover each cube with a thin layer of buttercream. It’s a little fiddly but if you hold the top, you can cover the sides more easily and do the top last. Refrigerate for a 30 minutes to stiffen up.
Step 3 - Tinting your sugar paste
- You’ll need all 3 type of paste for this project: Soft, easy to roll; Stiff modelling; and flower paste that sets hard. Choose your colour scheme: I’ve used a duck egg blue to match the wedding theme, but you can choose any soft summer shade. Add a small dot of colour in with a cocktail stick for pale shades and more for a darker colour. Knead well. Keep your tinted paste in plastic bags while you are working as it dries out very quickly.
Step 4 - Preparing the flower toppers
- Ideally, this should be done the day before to allow time to set. Use the flower paste, tinted to the colour required and cut out a variety of flower shapes. Stick your edible pearl beads in the centre of each flower while the paste is soft. Leave to dry on a foam drying mat.
Step 5 - Covering the sponges
- Knead your sugar paste well. I usually give my sugar paste 20 seconds in the microwave to soften it up and make it easier to work with. Dust your work surface with icing sugar and roll a fist sized piece of sugar paste into and even circle. Carefully cover your first sponge cube using the icing smoothers, pulling out the corners to avoid unwanted pleats. This can take some practice if you haven’t done this before. Cut around the edges with a sharp knife. Use the icing smoothers to press into a nice shape with well-defined edges. Leave aside to dry while you complete all 12 cubes.
Step 6 - Decorating the cakes
- Place your first cube on the turntable and use your modelling paste to make borders for the bottom of the cakes.
Press modelling paste into your embossing mate and cut thin strips with your fondant wheel set. You can play around with straight edges or fluted edges to vary the design. Apply a thin layer of glue around the bottom of your cakes and attach the border cutting a neat joining edge with your scissors. Stick the prepared flower toppers on with a dab of edible glue and leave them aside to dry completely.